
Walkthrough
Act1
Push the tree and pick up the stick. Use the stick on the lumpy ground. Pick up Scroll from skeleton. Read scroll. Use yarn with stick. Use Stick with Yarn on Cracked Ground. Use hole.
Watch cutscene play out. You are now on Oompah Island controlling Garland.
Pick up Bucket, Pick up Sellotape and String on table. Look at Map and look at strange language. Exit Map. Go to Play Room. Pick up Pen and Paper, look at drawings on wall. Look at Projector. Exit Projector film. Pick up Blunderbuss on table. Use sellotape on Left bottom Hook. Go to Laboratory. Pick up Yellow Object (Limestone). Read List of wall. Speak to Frithel. Ask him about Ball Bearings. Give him Gravel and then Limestone. He gives you ball bearings. Use Ball Bearings with Blunderbuss. Go back to Control Room and exit Sub to the Dock.
Look at Red Herring in Sea. Use Blunderbuss with Ball Bearings on Seagull. Walk left and talk to Fisherman, find out clue about how a fouled Smoking Pipe can ruin a man’s drink. Walk left all the way to the tree and pick up Twig. Use Twig with String, and Twig with String with Hook. Go back to end of dock and use Makeshift Red Herring with bubbles. You now have Smoking Pipe.
Go back to Play Room and use Smoking Pipe on Carlton’s drink. Now you have his attention. Speak to Carlton, choose option 3 each time to offend his drawing skills. Give him Pen and Paper. Pick up Picture of Auto. Pick up pictures on wall and soiled moonshine. Go to Treehouse at end of the Dock. Speak to Auto, mention Carlton. Give him pictures from wall. Use new portrait of Auto on Bucket and give to Auto. He is now convinced of human love and goes to Control Room. Pick up dart and Engine Room Key Card. Go back to Control Room in Sub.
Use Engine Room Key Card on Engine Room door. Enter Engine Room. Pick up Gloves in Garland’s locker. Pick up Extend-able Grabber. Go down Hold and look at the chest. Go back to Control Room speak to Comms on the right wall, they cannot hear you due to the frequency. Leave conversation and turn on the Radio, now use Comms. Choose dialogue option for code to unlock Chest. Write down code and go back to Hold. Use chest and enter the code. Pick up Library Card and look at reels. Go to Library, situated at left end of Dock.
Speak to Manrose. Enter Library. Pick up any poster. Use Soiled Moonshine with Sampson the Sea Urchin and he will be popped into the Glass. Pick up Fishbowl and look at Staff Rota on right wall. Talk to Chladni and go through dialogue options until you ask about who works in Library, you find out that Manrose might know where Chladni’s book is.
Go back outside and talk to Manrose and ask him about book. He will help if you prove your friendship. Go back to Control Room in Sub and play the arcade game, DESKTOP/MOBILE - you will see the Friendship Bracelet on the side of the cabinet - pick it up. NINTENDO SWITCH - you will need to play and complete the arcade to get the Friendship Bracelet.
Go back to Library and give Friendship Bracelet to Manrose. You both go into Library. Manrose finds you Chladni’s book and leaves with Manrose for the Control Room. Just Frithel and Carlton to go now.
Go back to Play Room and talk to Carlton, tell him that Auto is back! Auto comes in and talks to Carlton. Now use your poster on the Projector Movie. Carlton is aghast to see anything but a Western playing and leaves with Auto for the Control Room. Just Frithel to go now.
Go to Lab and look at the experiment. Ask Frithel about the experiment. Use Sampson on stool. Talk to Sampson. He is drunk due to the Moonshine, go through dialogue options and ask him to sing. Follow the colours from the songs he sings and pull the relating colour pump in that order. You get the right combination and the vial explodes to reveal the multi colour fluid Frithel was after. Frithel is happy and leaves for the Control Room. Go to Control Room.
Now that the crew are all in the Control Room, you find out your next set of objectives. First, use Fishbowl with Wetsuit, find out you need to de-sterilise the Fishbowl. Go to Play Room and pick up Projector Sheet. Use Dart with Blunderbuss and go to tree at end of the Dock. Use Blunderbuss With Dart on Tree. Use Projector Sheet with Sap. Head to Library. Look at Books at back on room, use Extend-able Grabber to pick up Precariously Hanging Book. Head back to Sub. Go to Engine Room. Use Glove with Coal. Look at Fishbowl with Glass in. Coal and de-sterilised Fishbowl is now in your inventory. Go to Lab and use Sap Soaked Sheet with Bunson Burner, it is now infused and water proof. Go to Control Room and use De-sterilised Fishbowl with Wetsuit.
Go to Library Entrance and use coal with loose Circular Sharp Object. Pick it up. Head back to Lab, read notes on Underwater and read about the special grit stones. Go through to Airlock. Use Airlock Lid and go to into the sea, Go to bottom left and use Circular Object on Red Stones. It is now sharp. Use Sharp Circular Object on Seaweed. Go up and right to the leak on Sub and use Sap Infused Sheet on hole in Sub. It is now plugged. Head back to Control Room and talk to Chladni. Give Auto the Winsmorian Book. Navigation is now sorted. All crew are present and the Sub is good to go!
END OF ACT 1.
Act1.5
Once the Shadow Creatures have left, pick up the Gum and look at the Mended Stick in your inventory. You unravel the yarn, use this on the cage. Use the Broken Stick with the yarn and you create a makeshift catapult, knocking the Flaming Stick to the floor. Use the scroll on the Flamed Stick, and you waft the smoke through the Peephole, causing the Shadow Creatures to return.
Use the Gum with the Yarn, and you have a horrible Gum Whip, use this on the KeyCard in the pocket of the first Shadow Creature and you retrieve the Ket Card. Use this on the Card Slot next to the door and escape to your freedom!
END OF ACT 1.5.
ACT 2
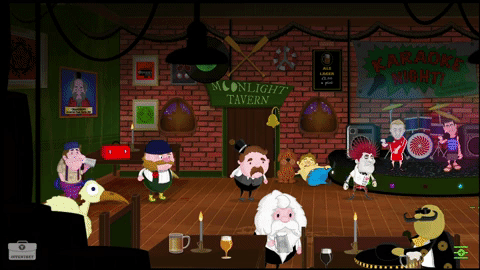
After the cutscene head off right to the tavern and enter. Once scene has played out, pick up Empty Tankard by Tilda and chat to her. She is too engrossed in the Collins Brothers performance to talk to you.
Go and talk to Fisherman. Keep asking about his toolbox until he asks you for a game of Ropeknots. Accept the challenge. You quickly realise that you do ‘knot’ know any, so exit Tavern. Watch cutscene unfold and go to the sub. The evil Shadow Creatures have done a number on it! Head to the Engine Room and pick up the Love Letters in Chladni’s locker. Go into the Hold and pick up the Helmholtz Red Mat. Head to the Lab and pick up the piece of chalk on the Easel.
Leave the Sub, and go all the way to the right of the Bay and talk to Manrose who is overseeing a stall in front of the Train Station. Ask him what he is up to, then ask for a balloon, and then ask for another item and take the Badge.
Go left towards the Mountain. Head to the very top of the Mountain and witness Roland being attacked by the wolves. Use Badge with Balloon and the POP scares away the wolves, leaving behind a few Wolf Poo’s.
Use the Empty Tankard on any Wolf Poo and head to Ropeman’s cave. Speak to Roland and get to know more about him. Ask him about Ropetricks, he will then proceed to show you the ropetricks that he knows.
Head back to the Sub and go to the Engine Room, pick up the Love Letters in Chladni’s Locker and then head to the Hold and pick up the Helmholtz Red Mat. Head back to the Lab. Pick up the Chalk on the Easel.Use the Poo Filled Tankard on the Pot on the workbench. Watch the cutscene unfold and after Frithel has left the room, pick up the Pooey Cologne and head to the Alley. Use the Pooey Cologne on Chladni and Edna and let the cutscene unfold. Walk over to the bin and pick it up - this reveals a copy of GAWP Magazine inside.
Pick it up and stand outside the Abandoned Building and speak to Springhead Jones, go through the options until you ask him to jump on his springy head. You jump on his head up to the window and into the Abandoned Building.
Pick up the Wires hanging out the wall, and use the Helmholtz Red Mat with the Strange Image on the wall. Once placed, use the Mat on the floor. When back in time, pick up the Framed Photo of the Collins Brothers (DESKTOP/MOBILE - Those swines have been ripping off your music! NINTENDO SWITCH - boy were they ugly when they were young!) and use the Helmholtz Red Mat again. Leave via the window.
Enter the Tavern and watch the cutscene. Give GAWP magazine to Carlton and tarnish the Collins Brothers bad boy reputation. He is livid and is now not a fan. Walk to Tilda and give her the Framed Photograph of Collins Brothers. She is furious that they (DESKTOP/MOBILE) didn't write their original material (INTENDO SWITCH) used to be ugly and smashes the photograph and turns her back. Pick up the Smashed Photo and go over to the bell by the main entrance and ring it to start the karaoke competition again. (NINTENDO SWITCH) You are told that the competition does not start until tonight, so head outside and bring time forward by using the Chalk on the Tavern sign, changing the writing to ‘On now!’. Go back inside and ring the Bell. The competition starts. The Collins Brothers get nil points and leave allowing Julio to win the competition. You can now speak to Tilda to get the info on VanDamme’s whereabouts. Speak to Tilda and leave the Tavern.
Head to the Theatre and go down the Side Alley. Talk to the Dodgy Geezer and give him the Photo of the Collins Brothers as a swap for the Fisherman’s portrait. Leave the Side of the Theatre and head back to the Tavern.
Speak to the Fisherman’s Brother and challenge him to a rematch of Ropetricks. Now you have learnt the tricks you can beat the Fisherman’s Bro’s tricks. Boat beats Fish. Dancing Man beats Static Man, Horse’s head beats tiny horse, Building beats Small House and finally, Fisherman’s Brother’s face beats Fisherman’s Bro’s face. He admits defeat and you can finally grab the Toolbox. Head to Auto on the Bay.
Use the Toolbox on Auto and watch as you bump him on the head which fixes his malfunctioning circuitry and after zapping your toolbox in retaliation, he pops off to the Train Platform. Head to the Train Platform and see that all the crew are there, next up we need to get the Console 5000 to the Train Platform that is hidden somewhere on the Mountain.
Give the Wires to Auto. He welds them together with his lazer eyes. Head back to the Mountain and use the Soldered Wires on the Big ‘Ole Crack. You are too heavy and need some assistance. Head to Roland’s Cave. Talk to Roland and ask him to help you with a daring assist. He agrees and you watch the cutscene play out. Use the Wires and go into the Secret Cave.
The Console 5000 is here as is a dead Shadow Creature, an old rare computer game and the (NINTENDO SWITCH) Instructions For the Console 5000 (DESKTOP/IOS) Console 5000 controller. Pick this up and the game Cars: THe Remix, (NINTENDO SWITCH) Look at the Instructions and learn how to operate the Console 5000. However, there is important info missing that is needed to use it. (DESKTOP/MOBILE) Look at the Console 5000 controller to see that you to need to prime it somehow to use on the Console 5000. Head to Roland’s Cave.
Give Cars: The Remix (A pixel for pixel version of a game I made on the Spectrum when I was 10! You can play it later on the speccy in the Play Room if you like) to Roland - he is so overjoyed to have the world's worst Spectrum game that he offers you the chance to take anything from his collection and then goes for a walk. (NINTENDO SWITCH) Pick up Land Of Dreams Spectrum Game, (DESKTOP/MOBILE) Shacklemouth Graphic Novel and Cars game. Head to the Theatre. Enter the main entrance of the Theatre and give Shacklemouth Graphic Novel to the Box Office guy. He becomes engrossed in it so you can pick up the Backstage key. Leave the Main Entrance of the Theatre and head down the Side of the Theatre. Use the key on the door and go into the Backstage area. Use the Love Letters on the Inputting Machine. Nick Chapman starts to say the words from the letter and gets himself fired. Leave Backstage and head back to Manrose outside the Train Platform.
Talk to Manrose and tell him that there is a position now going in the Theatre for the lead in Odyssey. He scoots over to the Theatre. The scene changes back to Backstage and Manrose is now the lead in the play. Pick up the Train Inspector Uniform and head back to the Play Room on the Submarine.
(NINTENDO SWITCH) Use the Spectrum and play Land Of Dreams. Once completed you get given a clue that there is a vinyl record version of Land Of Dreams in the Statue in the Hold. You are transported to the Hold and pick up the vinyl hidden in the Statue. It’s belly opens to reveal the record. (DESKTOP/IOS) Head to the Hold and pick up the Land OF Dreams vinyl that has come loose in the statue when the Shadow Creatures stole the Console 5000. Head back to the Play Room and use the Record Player. Hit the Reverse Button on the Record Player and then Play Land Of Dreams on the record player. (NINTENDO SWITCH) You find a secret message that reveals the missing Load word for the Console 5000. (DESKTOP/MOBILE) THe audio playing Land Of Dreams backwards triggers the Console 5000 Controller and primes it. Exit the Spectrum and go back to the Secret Cave.
Use the Helmholtz Mat Red with the Console 5000 and head back to the Train Platform. You will automatically put the Arrival Mat down, go back to the Secret Cave. (DESKTOP/MOBILE) Use the Console 5000 Controller on the Console 5000 to turn it on, success. (ALL FORMATS) Use the Console 5000 to teleport it to the Train Platform. Head back to the Train Platform. Put on your Train Inspector Outfit and get on the train. Let the cutscene commence and you have competed Act 2.
END OF ACT 2.
ACT 2.5
(NINTENDO SWITCH) You awake in a strange dream land with floating letters and weird giant heads. Pick up the Letter A on the ground and the Letter O in the floating letters. Click on the giant Spectrum 48k and fly there. Once you arrive, avoid the evil flying Console 5000 and run and pick up the letters on the floor and fly to the Ape heads to the left of the screen.
Use the letters A, P and E in the letter holders to spell GO APE, and watch the Ape disappear. Pick up the letters A,P,E then grab the letter the Ape released. Leave and head back to the start screen.
From here, head to the giant head of yours to the left.
Use the letters O,P,E and N to get the eyes to open, then grab the two extra letters in the eyes and the letters in the letter holders.
Head right and fly to the Shadow Head.
Once here, use the letters, R,O,P and E to release the letter K from its binding rope. Grab it, and the letters in the letter holder and return to the start screen.
Once here, use the letters A,W,A,K and E to set yourself free from the gas dream.
(DESKTOP/MOBILE) You awake in a strange dream land with floating images and weird giant heads. Pick up the Ape Fur card on the ground then click on the giant Spectrum 48k and fly there. Once you arrive, avoid the evil flying Console 5000 and run and pick up the image cards on the floor and fly to the Ape heads to the left of the screen.
Use the Barrel card, Ape Fur and Ladder card in the holders and watch the Ape disappear. Grab the image cards left behind by the Ape. Leave and head back to the start screen.
From here, head to the giant head of yours to the left.
Use the cards Left Eyebrow, Nose, Right Eyebrow to get the eyes to open, then grab the two extra cards in the eyes and head right and fly to the Shadow Head.
Once here, use the cards Tentacles, Eye, Boils to see the Giant head disappear and return to the start screen.
Once here, you will have unlocked the three floating images to set yourself free from the gas dream.
END OF ACT 2.5
ACT 3
The four explorers pull up in the train on the beach of Woolley Mountain and begin to walk up the mountain, returning to the scene where VanDamme was kidnapped.
We now see that the hole down into the Witches base is boarded and guarded by a Shadow Creature. Upon trying to first investigate the boarded hole, a giant Shadow Creature scares away our intrepid explorers - we will have to find another way.
First pick up the skull to the right. Use it on the puddle to carry some red dirty mud. Throw the red dirty mud at him by using the Skull with red dirty mud on Chladni. He removes and discards his soiled shoal. Pick it up.
Speak to Carlton, who is busy with his bowling ball. Ask Carlton if he found it funny watching Chladni get covered in dirty mud. He says yes, and this opens up a further dialogue tree. Ask Carlton about his bowling ball, say you want it. Use the skull with Carlton, you will convince him to swap his bowling ball for the skull, as he think it is a fancy new designer bowling ball.
Use the bowling ball with the boards. You throw wildly out, and the giant creature kicks the ball back. You need to find another way to get the bowl onto the boards to smash them. Talk to Frithel, ask about his book. He let’s you know that he will stop reading when he gets to use his maths knowledge on something. Ask him to help give you the correct degree to throw the ball, and he draws you an x marks the spot.
Use the bowling ball on the x marks the spot. Frithel has his calculations correct and you smash the boards to smithereens. Use the shoal on the hole in the ground and get the creature to come again by talking to the Guard Shadow Creature. The Big creature returns and walks across the shoal, falling straight down. The guard shadow creature bolts, leaving you free to access the hole, and into the witches lair.
You go deeper underground. Click on the sign.
You walk across the ropebridge and are presented with the kidnapped children! As you approach them, you realise that this is a terrible trap, and you fall into Bertie the Bounder’s lair. Take note of the Antenna that flashes and run and hide behind the rock to the right out of Bertie’s reach. pick up the big Horn Bone in the pile of bones and grab the Radio Innards before being smacked out of the room by Bertie. Either head left into the Corridor, and then up to the room with the Caged door, or get hit by Bertie’s lethal swing or boiled tongue and you’ll be propelled into the same room.
There are two exits, one to the corridor, and one that is currently closed. Look through the gate, and see a strange little creature in a tree. Yep, it is Winsmore, the creature that tricked VanDamme into Bertie’s lair. You can talk to him, but he will not let you through unless you answer another riddle! This guy and his riddles!!
Pick up the Broken Radio, this could be your way out of here! You just need to find the missing pieces and fix it somehow, you have the innards from Bertie’s Lair, now for the rest! Head into the Corridor and take a look at the Vent on the bottom left of the screen. It is shut tight. Need to open this. Head into the Workshop and chat with Reg. You find out that he is a lonely chap, with no allegiance to the Witch - maybe this guy can fix your radio?
Embark on a conversation with him, and find out more about his wants and who he is. You find out that he just wants ta companion and he will fix your Radio.
Look at the Tools to the left of the door and you will pick up a Screwdriver - perfect for the Vent possibly! Go back to the Corridor and use it on the Vent, it opens and falls to the floor. Head through the Vent into a secret room. It seems like a bedroom, who used to live here? Take a look at the Diary on the podium. It seems that a little angry girl lived here, and she went through quite a strange change! Exit the Diary and pick up the Walkman, Marmalade and Shard of Glass.
Go back in the Caged room. Use the Marmalade with the Shard of Glass, lovely, you have smeared sticky Marmalade across it. Listen to the walkman - ugh! Loud rock n roll! Blow the horn, loud LOUD! Use the Walkman in the crack in the ground, that’s the right idea, but it needs amplifying. Use the Horn Bone with the Walkman in the crack. That’s more like it, the RAWK has caused rocks to fall. Pick them up. Then throw them at the little scallywag Winsmore. He soon begs you to stop and opens the cage for you. Head outside.
Winsmore wants you to complete a riddle, but you have had enough of conversation. Try and pick up the Cage Operator on the base of the tree, Winsmore jumps down and picks it up. So instead, use the tree, and watch as you shake, shake and shake it until Winsmore falls out. He stands there abusing you, you try to go near him and he licks you good, ughh!. This time use the Marmalade covered glass to catch his tongue good, shake him far away into the distance. Hurrah, he's gone. Pick up the Cage Operator. Head back to the Cell in the Corridor.
Sampson is here! He tells you his story of how he got here. Use the Cage Operator to free him.
Talk to Sampson, you find out that upon sobering up in the Lab, he convinced Frithel to fit him inside a bottle of rum for good, but alas, Carlton picked him up and drank most of his alcohol living space, and tossed him and his home out the airlock rubbish chute. He floated and floated all the way to Woolley Mountain, where the witch trod on him, spiking her foot. His penance was to be thrown into the cells.
He promises to be the nicest and kindest Sea Urchin ever if you bust him out. That’s the last piece! Use the Cage Operator and free Sampson, he is ecstatic, and promises to be NICE FOR LIFE! Pick up Sampson and pop him in your hat. Pick up the Radio Blueprints and the Radio buttons. You now have all the Radio pieces!
Take your fixed Radio to the loner Shadow Creature. He can now fix your Radio as he has the plans, but won’t until he has a companion. Give him Sampson, Reg is ecstatic and pops him in his Vat and has a nice chat! Give Reg the Broken Radio and voila! Radio fixed!
Head back to Bertie’s Lair, use the fixed Radio. The Antennae turns on, you hide behind the rock with your pals and pray someone answers....
END OF ACT 3.
ACT 3.5
We cut back to the Dock on Oompah Island, and see the Fisherman still waiting for the Sub to return to begin his adventure. Tough luck, They are not returning. There is a loud alarm sounding off in the distance, best go and investigate.
Head to the Library, but on the way grab your Lunchbox in the small boat.
Once in the Library have a look at the books on the left shelf, The only one of interest is a book about HQ. Try and pick this up, it’s too high. Use the Lunchbox on the ground where it is slightly different. And jump on it to reach the book! Success!
As you grab the book, a secret ladder falls down! A secret room! Climb the ladder and let’s find out what is up there.
It is the HQ Room, with a giant screen. Garland suddenly appears on the screen, it seems that the HQ he turned on in Woolley Mountain tripped the alarm alerting of his danger! Try the big lever, no reason to pull that yet? Pick up the key on the left hanging on the hook and use the Buttons. You are presented with 8 musical buttons, but a combination is needed. Maybe there is a musical combo somewhere? Head back out to the Dock to the HQ mast near the Sub.
It is locked, use the key to open it. And click on the HQ mast. It is out of order, but that musical combo sounds familiar - the notes are the same as the ones the buttons make! Take note of the sequence and head back to the HQ Cockpit room. Use the buttons and click the combo to recreate the HQ mast musical combo. Success! Suddenly a Radio MIcrophone appears ion the dashboard. Use it. You communicate with Garland and he begs for your help. The mobster appears and the screen turns to interference. The Fisherman then goes to pull the lever in desperation to save Garland. Woaahh! It seems that the Library is some kind of Rocket ship and is taking off! Hold on to your hats and glasses!
The Rocket ship flies through the air, seemingly on a tractor beam to the source of the HQ Radio Transmitter that was alerted in Berties Lair!
The Rocketship crashes through the rook of Woolley Mountain, drawn to the Radio Transmitters in Bertie’s lair, and squashes him good!
You have free VanDamme and saved the boys! The Fisherman comes out of the ship and greets you. Time to rescue the Children. You climb atop the ship to reach them.
The Children are in you reach, but uh oh, who is that coming? It is the Evil Witch! She slaps you out of the scene and you land next to the Console 5000 that ha already been combined with Auto’s heart and has opened up a time portal! The Witch comes again, and zaps you good before jumping through the Portal. Once you come round, click on the Portal and jump on through to stop her wrecking havoc in the past!
You find yourself flying through time, the Witch is already there, and she has lost her Necklace of Nightmares - it has broken into three parts and are flying through time! Grab them before the Witch zapps you back to your time.
Once you have retrieved them all, you zap yourself out of time with the necklace and land back in your time. Use the Necklace Of Nightmares on the Console to destroy it and keep the Witch forever lost in limbo!
Once done you head back to all the lads in Bertie’s Lair, time to hop aboard the Ship with the Console 5000 and the missing Children, it’s time to go home! The ship takes off, and all seems well inside the ship - but oh no! The Console 5000 has switched itself on due to the take off of the Ship! The Portal appears and swallows you all up into time and space...
We cut back to the past in 1865, where Grandpappy is taking his daily stroll....suddenly a blast of light flashes and a portal opens in the sky, and an evil looking old hag drops out...it is the evil Witch! She has managed to get out of the portal back in 1865!
Watch the Ending Cutscene unfold.
Well done, you have completed The Mystery Of Woolley Mountain.
END OF GAME.
Push the tree and pick up the stick. Use the stick on the lumpy ground. Pick up Scroll from skeleton. Read scroll. Use yarn with stick. Use Stick with Yarn on Cracked Ground. Use hole.
Watch cutscene play out. You are now on Oompah Island controlling Garland.
Pick up Bucket, Pick up Sellotape and String on table. Look at Map and look at strange language. Exit Map. Go to Play Room. Pick up Pen and Paper, look at drawings on wall. Look at Projector. Exit Projector film. Pick up Blunderbuss on table. Use sellotape on Left bottom Hook. Go to Laboratory. Pick up Yellow Object (Limestone). Read List of wall. Speak to Frithel. Ask him about Ball Bearings. Give him Gravel and then Limestone. He gives you ball bearings. Use Ball Bearings with Blunderbuss. Go back to Control Room and exit Sub to the Dock.
Look at Red Herring in Sea. Use Blunderbuss with Ball Bearings on Seagull. Walk left and talk to Fisherman, find out clue about how a fouled Smoking Pipe can ruin a man’s drink. Walk left all the way to the tree and pick up Twig. Use Twig with String, and Twig with String with Hook. Go back to end of dock and use Makeshift Red Herring with bubbles. You now have Smoking Pipe.
Go back to Play Room and use Smoking Pipe on Carlton’s drink. Now you have his attention. Speak to Carlton, choose option 3 each time to offend his drawing skills. Give him Pen and Paper. Pick up Picture of Auto. Pick up pictures on wall and soiled moonshine. Go to Treehouse at end of the Dock. Speak to Auto, mention Carlton. Give him pictures from wall. Use new portrait of Auto on Bucket and give to Auto. He is now convinced of human love and goes to Control Room. Pick up dart and Engine Room Key Card. Go back to Control Room in Sub.
Use Engine Room Key Card on Engine Room door. Enter Engine Room. Pick up Gloves in Garland’s locker. Pick up Extend-able Grabber. Go down Hold and look at the chest. Go back to Control Room speak to Comms on the right wall, they cannot hear you due to the frequency. Leave conversation and turn on the Radio, now use Comms. Choose dialogue option for code to unlock Chest. Write down code and go back to Hold. Use chest and enter the code. Pick up Library Card and look at reels. Go to Library, situated at left end of Dock.
Speak to Manrose. Enter Library. Pick up any poster. Use Soiled Moonshine with Sampson the Sea Urchin and he will be popped into the Glass. Pick up Fishbowl and look at Staff Rota on right wall. Talk to Chladni and go through dialogue options until you ask about who works in Library, you find out that Manrose might know where Chladni’s book is.
Go back outside and talk to Manrose and ask him about book. He will help if you prove your friendship. Go back to Control Room in Sub and play the arcade game, DESKTOP/MOBILE - you will see the Friendship Bracelet on the side of the cabinet - pick it up. NINTENDO SWITCH - you will need to play and complete the arcade to get the Friendship Bracelet.
Go back to Library and give Friendship Bracelet to Manrose. You both go into Library. Manrose finds you Chladni’s book and leaves with Manrose for the Control Room. Just Frithel and Carlton to go now.
Go back to Play Room and talk to Carlton, tell him that Auto is back! Auto comes in and talks to Carlton. Now use your poster on the Projector Movie. Carlton is aghast to see anything but a Western playing and leaves with Auto for the Control Room. Just Frithel to go now.
Go to Lab and look at the experiment. Ask Frithel about the experiment. Use Sampson on stool. Talk to Sampson. He is drunk due to the Moonshine, go through dialogue options and ask him to sing. Follow the colours from the songs he sings and pull the relating colour pump in that order. You get the right combination and the vial explodes to reveal the multi colour fluid Frithel was after. Frithel is happy and leaves for the Control Room. Go to Control Room.
Now that the crew are all in the Control Room, you find out your next set of objectives. First, use Fishbowl with Wetsuit, find out you need to de-sterilise the Fishbowl. Go to Play Room and pick up Projector Sheet. Use Dart with Blunderbuss and go to tree at end of the Dock. Use Blunderbuss With Dart on Tree. Use Projector Sheet with Sap. Head to Library. Look at Books at back on room, use Extend-able Grabber to pick up Precariously Hanging Book. Head back to Sub. Go to Engine Room. Use Glove with Coal. Look at Fishbowl with Glass in. Coal and de-sterilised Fishbowl is now in your inventory. Go to Lab and use Sap Soaked Sheet with Bunson Burner, it is now infused and water proof. Go to Control Room and use De-sterilised Fishbowl with Wetsuit.
Go to Library Entrance and use coal with loose Circular Sharp Object. Pick it up. Head back to Lab, read notes on Underwater and read about the special grit stones. Go through to Airlock. Use Airlock Lid and go to into the sea, Go to bottom left and use Circular Object on Red Stones. It is now sharp. Use Sharp Circular Object on Seaweed. Go up and right to the leak on Sub and use Sap Infused Sheet on hole in Sub. It is now plugged. Head back to Control Room and talk to Chladni. Give Auto the Winsmorian Book. Navigation is now sorted. All crew are present and the Sub is good to go!
END OF ACT 1.
Act1.5
Once the Shadow Creatures have left, pick up the Gum and look at the Mended Stick in your inventory. You unravel the yarn, use this on the cage. Use the Broken Stick with the yarn and you create a makeshift catapult, knocking the Flaming Stick to the floor. Use the scroll on the Flamed Stick, and you waft the smoke through the Peephole, causing the Shadow Creatures to return.
Use the Gum with the Yarn, and you have a horrible Gum Whip, use this on the KeyCard in the pocket of the first Shadow Creature and you retrieve the Ket Card. Use this on the Card Slot next to the door and escape to your freedom!
END OF ACT 1.5.
ACT 2
After the cutscene head off right to the tavern and enter. Once scene has played out, pick up Empty Tankard by Tilda and chat to her. She is too engrossed in the Collins Brothers performance to talk to you.
Go and talk to Fisherman. Keep asking about his toolbox until he asks you for a game of Ropeknots. Accept the challenge. You quickly realise that you do ‘knot’ know any, so exit Tavern. Watch cutscene unfold and go to the sub. The evil Shadow Creatures have done a number on it! Head to the Engine Room and pick up the Love Letters in Chladni’s locker. Go into the Hold and pick up the Helmholtz Red Mat. Head to the Lab and pick up the piece of chalk on the Easel.
Leave the Sub, and go all the way to the right of the Bay and talk to Manrose who is overseeing a stall in front of the Train Station. Ask him what he is up to, then ask for a balloon, and then ask for another item and take the Badge.
Go left towards the Mountain. Head to the very top of the Mountain and witness Roland being attacked by the wolves. Use Badge with Balloon and the POP scares away the wolves, leaving behind a few Wolf Poo’s.
Use the Empty Tankard on any Wolf Poo and head to Ropeman’s cave. Speak to Roland and get to know more about him. Ask him about Ropetricks, he will then proceed to show you the ropetricks that he knows.
Head back to the Sub and go to the Engine Room, pick up the Love Letters in Chladni’s Locker and then head to the Hold and pick up the Helmholtz Red Mat. Head back to the Lab. Pick up the Chalk on the Easel.Use the Poo Filled Tankard on the Pot on the workbench. Watch the cutscene unfold and after Frithel has left the room, pick up the Pooey Cologne and head to the Alley. Use the Pooey Cologne on Chladni and Edna and let the cutscene unfold. Walk over to the bin and pick it up - this reveals a copy of GAWP Magazine inside.
Pick it up and stand outside the Abandoned Building and speak to Springhead Jones, go through the options until you ask him to jump on his springy head. You jump on his head up to the window and into the Abandoned Building.
Pick up the Wires hanging out the wall, and use the Helmholtz Red Mat with the Strange Image on the wall. Once placed, use the Mat on the floor. When back in time, pick up the Framed Photo of the Collins Brothers (DESKTOP/MOBILE - Those swines have been ripping off your music! NINTENDO SWITCH - boy were they ugly when they were young!) and use the Helmholtz Red Mat again. Leave via the window.
Enter the Tavern and watch the cutscene. Give GAWP magazine to Carlton and tarnish the Collins Brothers bad boy reputation. He is livid and is now not a fan. Walk to Tilda and give her the Framed Photograph of Collins Brothers. She is furious that they (DESKTOP/MOBILE) didn't write their original material (INTENDO SWITCH) used to be ugly and smashes the photograph and turns her back. Pick up the Smashed Photo and go over to the bell by the main entrance and ring it to start the karaoke competition again. (NINTENDO SWITCH) You are told that the competition does not start until tonight, so head outside and bring time forward by using the Chalk on the Tavern sign, changing the writing to ‘On now!’. Go back inside and ring the Bell. The competition starts. The Collins Brothers get nil points and leave allowing Julio to win the competition. You can now speak to Tilda to get the info on VanDamme’s whereabouts. Speak to Tilda and leave the Tavern.
Head to the Theatre and go down the Side Alley. Talk to the Dodgy Geezer and give him the Photo of the Collins Brothers as a swap for the Fisherman’s portrait. Leave the Side of the Theatre and head back to the Tavern.
Speak to the Fisherman’s Brother and challenge him to a rematch of Ropetricks. Now you have learnt the tricks you can beat the Fisherman’s Bro’s tricks. Boat beats Fish. Dancing Man beats Static Man, Horse’s head beats tiny horse, Building beats Small House and finally, Fisherman’s Brother’s face beats Fisherman’s Bro’s face. He admits defeat and you can finally grab the Toolbox. Head to Auto on the Bay.
Use the Toolbox on Auto and watch as you bump him on the head which fixes his malfunctioning circuitry and after zapping your toolbox in retaliation, he pops off to the Train Platform. Head to the Train Platform and see that all the crew are there, next up we need to get the Console 5000 to the Train Platform that is hidden somewhere on the Mountain.
Give the Wires to Auto. He welds them together with his lazer eyes. Head back to the Mountain and use the Soldered Wires on the Big ‘Ole Crack. You are too heavy and need some assistance. Head to Roland’s Cave. Talk to Roland and ask him to help you with a daring assist. He agrees and you watch the cutscene play out. Use the Wires and go into the Secret Cave.
The Console 5000 is here as is a dead Shadow Creature, an old rare computer game and the (NINTENDO SWITCH) Instructions For the Console 5000 (DESKTOP/IOS) Console 5000 controller. Pick this up and the game Cars: THe Remix, (NINTENDO SWITCH) Look at the Instructions and learn how to operate the Console 5000. However, there is important info missing that is needed to use it. (DESKTOP/MOBILE) Look at the Console 5000 controller to see that you to need to prime it somehow to use on the Console 5000. Head to Roland’s Cave.
Give Cars: The Remix (A pixel for pixel version of a game I made on the Spectrum when I was 10! You can play it later on the speccy in the Play Room if you like) to Roland - he is so overjoyed to have the world's worst Spectrum game that he offers you the chance to take anything from his collection and then goes for a walk. (NINTENDO SWITCH) Pick up Land Of Dreams Spectrum Game, (DESKTOP/MOBILE) Shacklemouth Graphic Novel and Cars game. Head to the Theatre. Enter the main entrance of the Theatre and give Shacklemouth Graphic Novel to the Box Office guy. He becomes engrossed in it so you can pick up the Backstage key. Leave the Main Entrance of the Theatre and head down the Side of the Theatre. Use the key on the door and go into the Backstage area. Use the Love Letters on the Inputting Machine. Nick Chapman starts to say the words from the letter and gets himself fired. Leave Backstage and head back to Manrose outside the Train Platform.
Talk to Manrose and tell him that there is a position now going in the Theatre for the lead in Odyssey. He scoots over to the Theatre. The scene changes back to Backstage and Manrose is now the lead in the play. Pick up the Train Inspector Uniform and head back to the Play Room on the Submarine.
(NINTENDO SWITCH) Use the Spectrum and play Land Of Dreams. Once completed you get given a clue that there is a vinyl record version of Land Of Dreams in the Statue in the Hold. You are transported to the Hold and pick up the vinyl hidden in the Statue. It’s belly opens to reveal the record. (DESKTOP/IOS) Head to the Hold and pick up the Land OF Dreams vinyl that has come loose in the statue when the Shadow Creatures stole the Console 5000. Head back to the Play Room and use the Record Player. Hit the Reverse Button on the Record Player and then Play Land Of Dreams on the record player. (NINTENDO SWITCH) You find a secret message that reveals the missing Load word for the Console 5000. (DESKTOP/MOBILE) THe audio playing Land Of Dreams backwards triggers the Console 5000 Controller and primes it. Exit the Spectrum and go back to the Secret Cave.
Use the Helmholtz Mat Red with the Console 5000 and head back to the Train Platform. You will automatically put the Arrival Mat down, go back to the Secret Cave. (DESKTOP/MOBILE) Use the Console 5000 Controller on the Console 5000 to turn it on, success. (ALL FORMATS) Use the Console 5000 to teleport it to the Train Platform. Head back to the Train Platform. Put on your Train Inspector Outfit and get on the train. Let the cutscene commence and you have competed Act 2.
END OF ACT 2.
ACT 2.5
(NINTENDO SWITCH) You awake in a strange dream land with floating letters and weird giant heads. Pick up the Letter A on the ground and the Letter O in the floating letters. Click on the giant Spectrum 48k and fly there. Once you arrive, avoid the evil flying Console 5000 and run and pick up the letters on the floor and fly to the Ape heads to the left of the screen.
Use the letters A, P and E in the letter holders to spell GO APE, and watch the Ape disappear. Pick up the letters A,P,E then grab the letter the Ape released. Leave and head back to the start screen.
From here, head to the giant head of yours to the left.
Use the letters O,P,E and N to get the eyes to open, then grab the two extra letters in the eyes and the letters in the letter holders.
Head right and fly to the Shadow Head.
Once here, use the letters, R,O,P and E to release the letter K from its binding rope. Grab it, and the letters in the letter holder and return to the start screen.
Once here, use the letters A,W,A,K and E to set yourself free from the gas dream.
(DESKTOP/MOBILE) You awake in a strange dream land with floating images and weird giant heads. Pick up the Ape Fur card on the ground then click on the giant Spectrum 48k and fly there. Once you arrive, avoid the evil flying Console 5000 and run and pick up the image cards on the floor and fly to the Ape heads to the left of the screen.
Use the Barrel card, Ape Fur and Ladder card in the holders and watch the Ape disappear. Grab the image cards left behind by the Ape. Leave and head back to the start screen.
From here, head to the giant head of yours to the left.
Use the cards Left Eyebrow, Nose, Right Eyebrow to get the eyes to open, then grab the two extra cards in the eyes and head right and fly to the Shadow Head.
Once here, use the cards Tentacles, Eye, Boils to see the Giant head disappear and return to the start screen.
Once here, you will have unlocked the three floating images to set yourself free from the gas dream.
END OF ACT 2.5
ACT 3
The four explorers pull up in the train on the beach of Woolley Mountain and begin to walk up the mountain, returning to the scene where VanDamme was kidnapped.
We now see that the hole down into the Witches base is boarded and guarded by a Shadow Creature. Upon trying to first investigate the boarded hole, a giant Shadow Creature scares away our intrepid explorers - we will have to find another way.
First pick up the skull to the right. Use it on the puddle to carry some red dirty mud. Throw the red dirty mud at him by using the Skull with red dirty mud on Chladni. He removes and discards his soiled shoal. Pick it up.
Speak to Carlton, who is busy with his bowling ball. Ask Carlton if he found it funny watching Chladni get covered in dirty mud. He says yes, and this opens up a further dialogue tree. Ask Carlton about his bowling ball, say you want it. Use the skull with Carlton, you will convince him to swap his bowling ball for the skull, as he think it is a fancy new designer bowling ball.
Use the bowling ball with the boards. You throw wildly out, and the giant creature kicks the ball back. You need to find another way to get the bowl onto the boards to smash them. Talk to Frithel, ask about his book. He let’s you know that he will stop reading when he gets to use his maths knowledge on something. Ask him to help give you the correct degree to throw the ball, and he draws you an x marks the spot.
Use the bowling ball on the x marks the spot. Frithel has his calculations correct and you smash the boards to smithereens. Use the shoal on the hole in the ground and get the creature to come again by talking to the Guard Shadow Creature. The Big creature returns and walks across the shoal, falling straight down. The guard shadow creature bolts, leaving you free to access the hole, and into the witches lair.
You go deeper underground. Click on the sign.
You walk across the ropebridge and are presented with the kidnapped children! As you approach them, you realise that this is a terrible trap, and you fall into Bertie the Bounder’s lair. Take note of the Antenna that flashes and run and hide behind the rock to the right out of Bertie’s reach. pick up the big Horn Bone in the pile of bones and grab the Radio Innards before being smacked out of the room by Bertie. Either head left into the Corridor, and then up to the room with the Caged door, or get hit by Bertie’s lethal swing or boiled tongue and you’ll be propelled into the same room.
There are two exits, one to the corridor, and one that is currently closed. Look through the gate, and see a strange little creature in a tree. Yep, it is Winsmore, the creature that tricked VanDamme into Bertie’s lair. You can talk to him, but he will not let you through unless you answer another riddle! This guy and his riddles!!
Pick up the Broken Radio, this could be your way out of here! You just need to find the missing pieces and fix it somehow, you have the innards from Bertie’s Lair, now for the rest! Head into the Corridor and take a look at the Vent on the bottom left of the screen. It is shut tight. Need to open this. Head into the Workshop and chat with Reg. You find out that he is a lonely chap, with no allegiance to the Witch - maybe this guy can fix your radio?
Embark on a conversation with him, and find out more about his wants and who he is. You find out that he just wants ta companion and he will fix your Radio.
Look at the Tools to the left of the door and you will pick up a Screwdriver - perfect for the Vent possibly! Go back to the Corridor and use it on the Vent, it opens and falls to the floor. Head through the Vent into a secret room. It seems like a bedroom, who used to live here? Take a look at the Diary on the podium. It seems that a little angry girl lived here, and she went through quite a strange change! Exit the Diary and pick up the Walkman, Marmalade and Shard of Glass.
Go back in the Caged room. Use the Marmalade with the Shard of Glass, lovely, you have smeared sticky Marmalade across it. Listen to the walkman - ugh! Loud rock n roll! Blow the horn, loud LOUD! Use the Walkman in the crack in the ground, that’s the right idea, but it needs amplifying. Use the Horn Bone with the Walkman in the crack. That’s more like it, the RAWK has caused rocks to fall. Pick them up. Then throw them at the little scallywag Winsmore. He soon begs you to stop and opens the cage for you. Head outside.
Winsmore wants you to complete a riddle, but you have had enough of conversation. Try and pick up the Cage Operator on the base of the tree, Winsmore jumps down and picks it up. So instead, use the tree, and watch as you shake, shake and shake it until Winsmore falls out. He stands there abusing you, you try to go near him and he licks you good, ughh!. This time use the Marmalade covered glass to catch his tongue good, shake him far away into the distance. Hurrah, he's gone. Pick up the Cage Operator. Head back to the Cell in the Corridor.
Sampson is here! He tells you his story of how he got here. Use the Cage Operator to free him.
Talk to Sampson, you find out that upon sobering up in the Lab, he convinced Frithel to fit him inside a bottle of rum for good, but alas, Carlton picked him up and drank most of his alcohol living space, and tossed him and his home out the airlock rubbish chute. He floated and floated all the way to Woolley Mountain, where the witch trod on him, spiking her foot. His penance was to be thrown into the cells.
He promises to be the nicest and kindest Sea Urchin ever if you bust him out. That’s the last piece! Use the Cage Operator and free Sampson, he is ecstatic, and promises to be NICE FOR LIFE! Pick up Sampson and pop him in your hat. Pick up the Radio Blueprints and the Radio buttons. You now have all the Radio pieces!
Take your fixed Radio to the loner Shadow Creature. He can now fix your Radio as he has the plans, but won’t until he has a companion. Give him Sampson, Reg is ecstatic and pops him in his Vat and has a nice chat! Give Reg the Broken Radio and voila! Radio fixed!
Head back to Bertie’s Lair, use the fixed Radio. The Antennae turns on, you hide behind the rock with your pals and pray someone answers....
END OF ACT 3.
ACT 3.5
We cut back to the Dock on Oompah Island, and see the Fisherman still waiting for the Sub to return to begin his adventure. Tough luck, They are not returning. There is a loud alarm sounding off in the distance, best go and investigate.
Head to the Library, but on the way grab your Lunchbox in the small boat.
Once in the Library have a look at the books on the left shelf, The only one of interest is a book about HQ. Try and pick this up, it’s too high. Use the Lunchbox on the ground where it is slightly different. And jump on it to reach the book! Success!
As you grab the book, a secret ladder falls down! A secret room! Climb the ladder and let’s find out what is up there.
It is the HQ Room, with a giant screen. Garland suddenly appears on the screen, it seems that the HQ he turned on in Woolley Mountain tripped the alarm alerting of his danger! Try the big lever, no reason to pull that yet? Pick up the key on the left hanging on the hook and use the Buttons. You are presented with 8 musical buttons, but a combination is needed. Maybe there is a musical combo somewhere? Head back out to the Dock to the HQ mast near the Sub.
It is locked, use the key to open it. And click on the HQ mast. It is out of order, but that musical combo sounds familiar - the notes are the same as the ones the buttons make! Take note of the sequence and head back to the HQ Cockpit room. Use the buttons and click the combo to recreate the HQ mast musical combo. Success! Suddenly a Radio MIcrophone appears ion the dashboard. Use it. You communicate with Garland and he begs for your help. The mobster appears and the screen turns to interference. The Fisherman then goes to pull the lever in desperation to save Garland. Woaahh! It seems that the Library is some kind of Rocket ship and is taking off! Hold on to your hats and glasses!
The Rocket ship flies through the air, seemingly on a tractor beam to the source of the HQ Radio Transmitter that was alerted in Berties Lair!
The Rocketship crashes through the rook of Woolley Mountain, drawn to the Radio Transmitters in Bertie’s lair, and squashes him good!
You have free VanDamme and saved the boys! The Fisherman comes out of the ship and greets you. Time to rescue the Children. You climb atop the ship to reach them.
The Children are in you reach, but uh oh, who is that coming? It is the Evil Witch! She slaps you out of the scene and you land next to the Console 5000 that ha already been combined with Auto’s heart and has opened up a time portal! The Witch comes again, and zaps you good before jumping through the Portal. Once you come round, click on the Portal and jump on through to stop her wrecking havoc in the past!
You find yourself flying through time, the Witch is already there, and she has lost her Necklace of Nightmares - it has broken into three parts and are flying through time! Grab them before the Witch zapps you back to your time.
Once you have retrieved them all, you zap yourself out of time with the necklace and land back in your time. Use the Necklace Of Nightmares on the Console to destroy it and keep the Witch forever lost in limbo!
Once done you head back to all the lads in Bertie’s Lair, time to hop aboard the Ship with the Console 5000 and the missing Children, it’s time to go home! The ship takes off, and all seems well inside the ship - but oh no! The Console 5000 has switched itself on due to the take off of the Ship! The Portal appears and swallows you all up into time and space...
We cut back to the past in 1865, where Grandpappy is taking his daily stroll....suddenly a blast of light flashes and a portal opens in the sky, and an evil looking old hag drops out...it is the evil Witch! She has managed to get out of the portal back in 1865!
Watch the Ending Cutscene unfold.
Well done, you have completed The Mystery Of Woolley Mountain.
END OF GAME.